Showing posts with label Decor. Show all posts

Saturday, August 10, 2013

Halloween decorating ideas- Blue, (turquoise) white and black!

I am loving all of the fun Halloween decorating ideas that I have been seeing floating around the web lately. I am particularly drawn to anything blue or turquoise for Halloween this year.  I thought I would share some of the ideas that I have come across and hopefully help you spark some creative ideas of your own.  If you don't care for blue, what about interjecting green, fuchsia, or lavender?  (Hmm....maybe I will find some of those for a future post!)


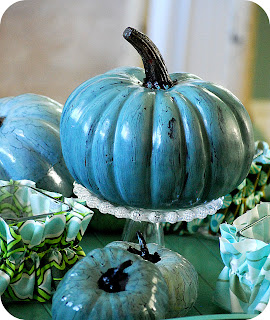
How cute is this!  Run down and grab some decorative pumpkins from your local craft store and paint them your favorite Halloween accent color!  She has displayed them on cake stand and dressed them up with some all picks.  Super cute!
image turquoise Pumpkin Halloween decorating
Completely-coastal.com
Here is a cute idea.  Instead of using your typical orange and black, use your unique color of choice when creating your crafty decor!  Just interject a little bit of the color here and there.  Aren't these cute?
image turquoise Halloween decorating
Paint me Plaid
This neat turquoise and silver vignette is done with mercury glass pieces and glittered skulls.  I have found several of these pieces at my local TJ Maxx and Dollar Tree.  
image turquoise Halloween decorating
Here is another nicely done blue pumkin done with chalk paint.  LOVE IT!
image turquoise Pumpkin Halloween decorating
Tater Tots and Jello
Classy and tasteful!  This tablescape could be used during Halloween and Thanksgiving. Well done!
image turquoise Pumpkin Halloween decorating
Home stories at Oz 

Change it up this year.  Use unique colors when putting together your Halloween decorating items this year. NO RULES!  Just have fun with it!

Wednesday, October 10, 2012

Halloween Vinyl decals!


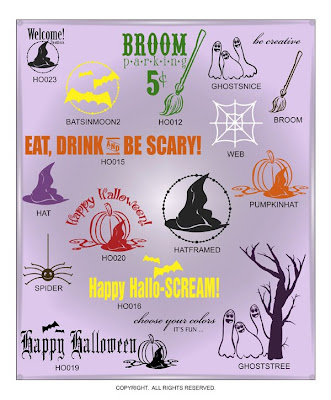
Take a look at all of the Halloween designs!!  They are so fun.  Think mirrors, doors, windows, plaques, plates and jars and even pumpkins!  There are hundreds of way to use these darling designs.


Monday, February 27, 2012

Doors!

Oh how I love unique doors!  From antique ones to modern day designs.  Photographed doors make gorgeous artwork as well! Here are some fun doors that I love. Of course I have many other beauties on Pinterst if you would like to take a peek! :) Tomorrow I will give you some fun ideas on how to use antique doors in your home decor!

danheller.com

elizabeth-aboutnewyork.blogspot.com

katiehutchison.com

pixdaus.com

sunsetjunk.com

sunsetjunk.com

azideacenter.com-1

Wednesday, September 8, 2010

Halloween Lamp Shades and more!


Here are some fun ideas for vinyl...LAMPSHADES!

How fun is this? You can create a spooky or festive feel by adding vinyl to your lamp shades! You can create a silhouette feel by applying the vinyl on the inside of your shade....(use a low wattage bulb), or you can add color by applying the vinyl to the outside of the shade.

There are so many things you can apply...decorative elements, monograms and more! You can purchase these Halloween designs on the sidebar where you see the "Buy it now" button.

All designs are sized to fit an average shade. The vinyls are 9" tall but can be sized to fit any space! If you want different colors or designs, other than what is shown, feel free to email and let me know what you would like!

Sunday, September 27, 2009

Pumpkin Topiary


Here is a cute pumpkin topiary. It can be used all season long! Use it for Fall, Halloween and Thanksgiving.

Materials Needed
-3 small artificial pumpkins (Ones that can be carved)
-1 small strand white holiday lights (50 bulbs or less)
-1 pot or pedestal
-Moss
-Small screw in hook
-Glue Gun
-Exacto Knife

First decide what designs you would like to carve in your pumpkins. If you want a more classic look, choose simple shapes. You can carve leafs for a Fall look or something spooky such as a cat or skull for a Halloween look. Begin by cutting the top and bottom off of TWO of the pumpkins and the bottom out of the third one. Use an exacto knife. Keep the holes SMALL. Remember you are stacking these and you do not want the holes to be seen once they are stacked. A good rule of thumb is to keep the holes about the size of a small yogurt lid.

You should now have-
-1 pumpkin with the bottom cut out (This is your top pumpkin)
-2 pumpkins with the top and bottom cut out (This is the middle and bottom pumpkins)


Next, with a pencil, draw your design on each pumpkin and then carve it out with the exacto knife.

After you are finished carving, screw a small hook into the top inside part of the pumpkin that has only the bottom cut out. (This is the top pumpkin.) It is easiest to do this with needle nose pliers. Next hook the end of the lights on the hook. Feed the rest of the strand down thru each pumpkin. You will want to bunch a section of lights in each pumpkin. Bring the plug end of the strand out the bottom of the last pumpkin making sure to leave the last light inside of the pumpkin.

It is now time to glue everything together. Using a hot glue gun, apply the bottom pumpkin to your base, (pot, pedestal etc.) Continue stacking and gluing the pumpkins on top of each other until they are all glued together. Be sure the lights don't poke out in between each pumpkin layer.

Lastly glue your moss in between each layer including the base and bottom pumpkin.

Voila! You now have a beautiful pumpkin topiary! Make another one and have a pair!

The topiaries look great on a mantle or grouped with other fall accessories on a cabinet or counter.