Saturday, August 10, 2013

Halloween decorating ideas- Blue, (turquoise) white and black!

I am loving all of the fun Halloween decorating ideas that I have been seeing floating around the web lately. I am particularly drawn to anything blue or turquoise for Halloween this year.  I thought I would share some of the ideas that I have come across and hopefully help you spark some creative ideas of your own.  If you don't care for blue, what about interjecting green, fuchsia, or lavender?  (Hmm....maybe I will find some of those for a future post!)


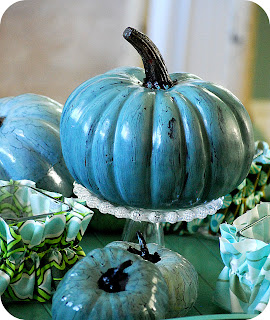
How cute is this!  Run down and grab some decorative pumpkins from your local craft store and paint them your favorite Halloween accent color!  She has displayed them on cake stand and dressed them up with some all picks.  Super cute!
image turquoise Pumpkin Halloween decorating
Completely-coastal.com
Here is a cute idea.  Instead of using your typical orange and black, use your unique color of choice when creating your crafty decor!  Just interject a little bit of the color here and there.  Aren't these cute?
image turquoise Halloween decorating
Paint me Plaid
This neat turquoise and silver vignette is done with mercury glass pieces and glittered skulls.  I have found several of these pieces at my local TJ Maxx and Dollar Tree.  
image turquoise Halloween decorating
Here is another nicely done blue pumkin done with chalk paint.  LOVE IT!
image turquoise Pumpkin Halloween decorating
Tater Tots and Jello
Classy and tasteful!  This tablescape could be used during Halloween and Thanksgiving. Well done!
image turquoise Pumpkin Halloween decorating
Home stories at Oz 

Change it up this year.  Use unique colors when putting together your Halloween decorating items this year. NO RULES!  Just have fun with it!

Monday, June 24, 2013

4th of July vinyl decals now released!

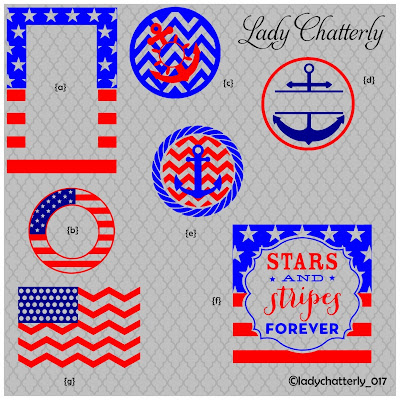
How cute are these!?  Just in time for your 4th of July décor.  Each of these can be ordered in multiple colors and sizes. 
Image July 4th Vinyl Decal

Image July 4th Vinyl Decal


Image July 4th Vinyl Decal

Monday, June 17, 2013

Vinyl decals for your wedding!

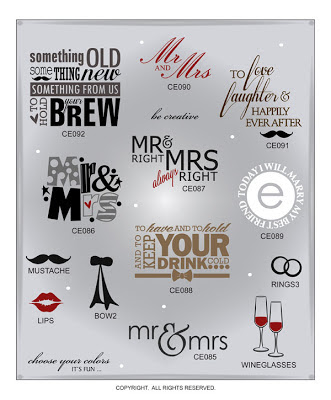
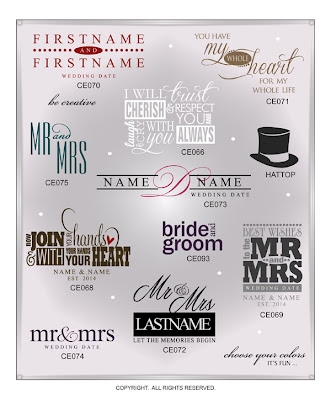
Wedding season is among us and I have several new designs for your special day.  Each design can be customized with your name, monogram and the color of your choice!
 Image Wedding Vinyl DecalImage Wedding Vinyl DecalImage Wedding Vinyl Decal

Friday, May 31, 2013

What do I do at 3am?

My dear sweet and might I say very handsome husband has begun to snore. Yay me! So at about 3am I am awakened by the sounds of a very tired, fast asleep husband who clearly cannot hear himself. So, what's a girl to do? As I roll over I find my phone lying there calling out my name. I know! Bad idea! But....I give in. Pinterest has missed me lately. To my surprise one of the companies I am following has posted their daily finds. What's the problem you ask? Well I could tell you but as Pinterest has proven, a picture speaks a thousand words!


So as I am pinning these {and probably 30 different recipes, wait I'm sure it may have even been more}, I begin realizing that when my followers awaken from their deep, uninterrupted sleeps, they will find that their Pinterest "following" board has been over taken by CHOCOLATE, LEMON , and PEANUT BUTTER! Yikes!!

Hmmm...my excuse? After all, I do have a graduation party to plan for my daughter...:)

Follow me! Maybe I will create a "support" board for insomniacs with a sweet tooth!


Follow Me on Pinterest

Thursday, May 30, 2013

The new layout is nearly done!

Wheww!   I don't pretend to be a computer whiz by any means but I can do a few things here and there. This is why I am just now revealing the new site layout.  YAY!  I am almost done.  Just a few more things to do.  I will be adding and rearranging a few things here and there but hopefully it is fully functioning now. :) Let me know what you think and if you see any bugs!


Sunday, April 7, 2013

Gardening potting bench on the brain!

It has been DUMPING rain for the last couple days but none-the-less I have gardening on the brain!  I am thinking about building a little potting bench.  Here are a few of my inspirations.  Hmmmm....what to do? 
ana-white.com


countrycottageliving.com


plantsandgardening.storeblogs.com

Friday, April 5, 2013

DIY Farmhouse bed!

I thought I would share with you one of the projects that I built recently!  This wonderful king size farmhouse bed!  What do you think?  It really wasn't too bad.  I got my plans from Ana White.  She has made it REALLY easy to build her DIY furniture!  She supplies the shopping list, cut list and instructions. I modified the plan when I found another version on her site from someone else who built the same bed.  Here is her link-

I wanted cubbies for storage and also wanted to access the space under the bed between the cubbies. So here is what I did~

I first build 2 sets of cubbies.  Each one is 16" deep x 15" Tall x 80" Long.
I added 1" trim to the front of the cubby to finish the edges which made the depth 17". I attached the bottom trim flush with the inside of the cubby so it raised the height to about 15 1/2".  (Visit the site and this will all make sense!)

Next I built the headboard and the foot board.  I attached the center board of the foot board to the posts with top hinges and a latch at the bottom so that I could open it to access the middle of the bed. 

Finally (After painting everything!) I screwed the headboard and foot board to the cubbies.  I used L brackets in some place to make it even more secure.  I didn't want the bed to move or squeak AT ALL!  :)

Be aware that when you follow Ana's plans she turned her king size bed on its side and so the dimensions are not exactly accurate for a typical king size bed.  READ all of the directions before you begin your project.

The overall cost was about $400 or so.  About 1/4 of what it would have cost me to buy one!  And...I know it is done right and with solid wood. 


Here are the cubbies!  I bought regular old Steralite storage bins from Target and slip covered them with canvas. I wanted BIG bins so this was my best option. 


I simply laid the tote on top of the fabric (one side at a time) and cut each piece about 2 inches bigger than that actual size to allow for the seam.  The exception was at the top.  I wanted the fabric to fold over the top so I added about 5" to the height and used the finished edge of the fabric.


As you can see there is a lip around the top of the bin. Once I sewed the four sides together I pulled the slipcover over the bin (Inside out) and I folded the fabric at the corners and pinned it so that it would fit snug and not fall off of the bin.  I then stitched the mitered corners.  I had to be careful to not sew it too tight because I had to be able to pull it over the bin. Next, I simply adhered Velcro to the bin and the underside of the fabric to attach it. I glued the Velcro to the bin with E6000 glue and held it down with masking tape until it dried. I stitched the Velcro to the fabric.  It's not going anywhere!  I am super happy with the finished project!  I think I will be adding some sort of vintage print to the front of the slip covers at some point but that is another project for another day!