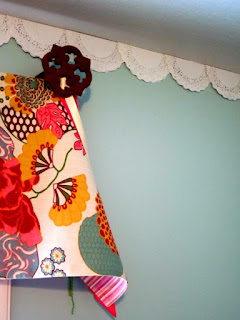
In honor of the many graduating seniors, I thought I would post some fun, inexpensive dorm decorating ideas. I was able to share some of these ideas with some of my Young Women at our youth activity last night and it was a lot of fun!


Showing posts with label For your walls. Show all posts
Showing posts with label For your walls. Show all posts
Wednesday, May 23, 2012
Vinyl decal typography on wall!
I thought I would share one of my designs that I created in my daughters bedroom! I cut out different sized letters and adhered them on her wall. Isn't this fun!? I am pretty happy with the finished product! Yippee!
#vinyldecals, #yellowbedroom, #decorating, #typography
Labels:
aparment,
bedroom decorating,
Color,
Craft Projects,
Decor Ideas,
Decorating,
DIY,
For your walls,
Home,
Interior decorating ideas,
typography,
Vinyl Decals,
Wall art,
Wall paper,
Wallpaper
Friday, May 4, 2012
Picture frame arrangement ideas!
We have all seen the beautiful wall of framed photos. It may not be as easy as it looks to create the perfect layout....that is until now! As I was cruising Pinterest...(do that a bit too frequently nowadays!) and found this wonderful layout article! Unfortunately there was no credit link. I will continue to look for the original post but for now I had to share!
Once you have chosen your layout, use craft paper or brown paper rolls from your local home improvement store and cut out the correct sized squares and adhere them to your wall. Once you are happy with the layout find the center and simply hammer your nails into the wall thru the paper itself. :)
EASY PEASY!!!!!! Please feel free to share any other tips you have for hanging your artwork! I would love to hear them~
Labels:
bathroom,
Closet Remodel,
Collage,
Decor Ideas,
Decorating,
DIY,
Family Photo Wall,
For your walls,
Frames,
Home,
Interior decorating ideas,
organization,
Organize,
Photo,
Picture,
Wall art
Thursday, April 26, 2012
Dorm Room Decorating!
In honor of all of the upcoming graduating seniors I thought it would be fun to post some easy, inexpensive dorm decorating ideas! I had the opportunity to share some of these ideas with my Young Women at our youth activity last night and I thought it would fun to share them with you today~
Whether you are moving into an apartment, dorm or studio, the hard truth is that most students have a shoe string budget and decorating is at the bottom of the budget. Think outside of the box. Use what you have and save of storage- Yard sales and thrift stores can be a great resource for fun purchases. 3M removable hooks will be a must have as most student housing does not allow holes to be put in the walls.
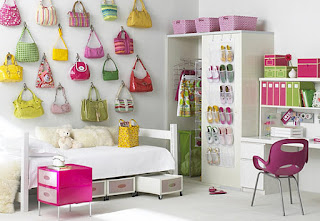
Use your a cute pair of heels for bookends! How about creating an artwork wall with your hats, purses or scarves! Take a peek at some of these photos. They are all inexpensive and very easy~
 |
| Use different sized embroidery loops and mix and match fabric to add color to your room! Hang it with twine or 3M removable hooks! Choctawk |
 |
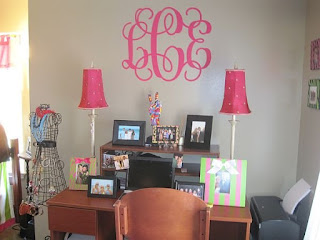
| Of course vinyl decals are an inexpensive way to add personality to your boring walls! Use quotes, monograms or decorative designs to add your own flare! They are easy to install and easily removed~ |
 |
| I LOVE this idea! So easy to do! Use paper doilies, (You can find these at your local dollar store!) and hand them with tape, ticky tack or twine. SOOOOO cute! |
 |
| Another variation of color blocking with scrapbook paper! You can purchase an entire coordinationg stack pack of scrapbook paper at Joannes for only $10 when you use one of their coupons or wait for them to go on sale..(which is frequent) Lovely Undergrad |
 |
| This is a crazy but super fun idea! I just had to post it. :) The uncommon perspective |
 |
| This is too cute! What and easy way to create dramatic art and useful storage all at the same time! pbteen |
 |
| Large posters, cork boards and frames are a great way to dress any drab space and add some of your personality! cool-kids-rooms |
Labels:
aparment,
buget,
college,
Craft Projects,
Decor Ideas,
Decorating,
DIY,
Dorm Room,
For your walls,
inexpensive,
Repurpose,
Small spaces,
Vinyl Decals,
Vinyl lettering,
Wall art,
Wall coverings,
Wallpaper
Monday, February 13, 2012
Unique Walls!
Do you want to make a dramatic difference in one of your rooms without redecorating the entire thing? Dress up your walls! Simple identify your focal wall and wallpaper it or paint it a fun or dramatic color! Yes, I said wallpaper. :) There are so many beautiful and unique wall coverings available now that you can't dismiss it as your grandmothers design idea anymore!
When deciding which wall is your focal wall, identify the area in which you want the eye to go to. If you have a fireplace, built-in bookcase or architectural element in the room, this is the most natural focal point. If your room has no distinguishing features, identify the largest furniture pieces. In the bedroom, the wall behind your bed should be your focal wall, the kitchen may be the wall behind the eating nook etc.
Once you have identified your focal wall, its time to choose your wall covering or color! Don't be afraid to go a bit beyond your comfort level. Often times we do a project and don't quite go as bold as we would like and it just doesn't turn out as spectacular as we were hoping. That is because we fail to push ourselves to go all the way with the design. If you are using paint and don't like the color, simply paint over it! Paint is easily changed and if you are doing a focal wall, it is typically a smaller area to change.
When choosing your color, don't over saturate your room with one color. If you have blonde wood in your bedroom, stay away from yellow. The color on the wall should pop against the furniture or wood. Of course there are exceptions to this rule. If you are doing a monochromatic design, keep it subtle. If your bedding is Blue, don't do blue on the walls. You may have a secondary accent color in your bedding or accessories that you can highlight by painting the wall a similar color.
Take your time. Always test the color on your wall before buying an entire gallon. Lighting, current wall colors and number of coats will effect the overall outcome of the paint. Look at your test area at different times of the day. This will give you an idea of how the color will change due to lighting. If you want to go nuetral, choose something a little more saturated than you may not typically go with. A dark mocha, rich chocolate or silky cappuccino color rather than your everyday beige will be much more appealing!
Now for some inspiration! Take a look at these FABULOUS wall treatments and colors!
 |
| This is one of my FAVES! I love the unique design and natural tones! This wallpaper was developed by Wall and Deco! |
 |
| Wall and Deco |
 |
| http://www.kayainternational.com |
 |
| http://www.decorpad.com |
 |
| The Cross Decor and Design via Decor Pad |
 |
| Nicholas Haslam |
 |
| Apartment Therapy |
 |
| Paint graphic designs using painters tape to add interest! HGTV.com |
Sunday, August 1, 2010
Family Tree Photo Wall


How cute is this! A beautiful blue wall with a soft blue vinyl tree applied to create a gorgeous tone on tone effect. Photos are placed on the wall as if to hang from the tree! I just love this!
Think outside of the box. How about a large picture frame made with vinyl to frame your already framed art! I also took one of the swirl designs from the frame and created a border along the top of the chair rail. I did this in my daughter's room. So cute!
Subscribe to:
Posts (Atom)


