Showing posts with label Vinyl lettering. Show all posts

Sunday, May 20, 2012

Vinyl Ceiling and light swith medallions!

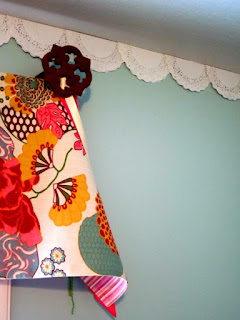
I have some fun new projects that I have been working on but I had to post this picture of one of my new designs! How fun is this? I took a combination of a design from the "frame" designs and doubled up on it to have a double layered effect. Keep in mind that most of the designs can be "tweaked" to fit your desired results! Think outside the box-


Here is another one I did quite awhile ago and I think I have already posted a pic. :) I created this using 2 of the same designs from one of the embellishment collections (#EM017).  You can now find this complete design under the ceiling medallion section labeled #CME003!


Here is a photo of a simple embellishment around a light switch.  No more boring light switches!


Here are some of the fun options used to embellish your switches and fixtures! Some of the designs are used as monograms and such but any part of the shape can be seperated and used in your design!


Thursday, April 26, 2012

Dorm Room Decorating!

In honor of all of the upcoming graduating seniors I thought it would be fun to post some easy, inexpensive dorm decorating ideas!  I had the opportunity to share some of these ideas with my Young Women at our youth activity last night and I thought it would fun to share them with you today~

Whether you are moving into an apartment, dorm or studio, the hard truth is that most students have a shoe string budget and decorating is at the bottom of the budget.  Think outside of the box.  Use what you have and save of storage-  Yard sales and thrift stores can be a great resource for fun purchases.  3M removable hooks will be a must have as most student housing does not allow holes to be put in the walls.
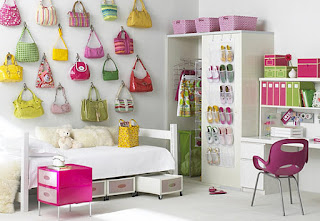
Use your a cute pair of heels for bookends!  How about creating an artwork wall with your hats, purses or scarves!  Take a peek at some of these photos.  They are all inexpensive and very easy~


Image small dorm room decorating 
Use different sized embroidery loops and mix and match fabric to add color
to your room! Hang it with twine or 3M removable hooks!
Choctawk


An easy way to add color to your walls is to hang fabric.  No need to
invest in expensive fabrics, simply find a sheet, inexpensive drapery panel
and hang it with twine or a rod using 3M removable hooks!
This works great for a headboard as well!  Define the head or your bed
with a section of fabric~

Of course vinyl decals are an inexpensive way to add personality to your
boring walls!  Use quotes, monograms or decorative designs to add your own
flare!  They are easy to install and easily removed~


I LOVE this idea!  So easy to do!  Use paper doilies, (You can find these
at your local dollar store!) and hand them with tape, ticky tack or twine.
SOOOOO cute!

This is a really easy way to add color to your walls.  I believe these are paint sample
sheets that you can get at Benjamin Moore.  This is an easy way to create a color
blocking design without painting.  I would recommend decoupaging the paper to
protect it.
Another variation of color blocking with scrapbook paper!  You can purchase
an entire coordinationg stack pack of scrapbook paper at Joannes for only $10
when you use one of their coupons or wait for them to go on sale..(which is frequent)
Lovely Undergrad


This is a crazy but super fun idea!  I just had to post it. :)
The uncommon perspective
I loved this room.  It is a bit more over the top but I wanted to share it because it
is a great example of what is possible in such a small space.  Frequent yard sales, thrift stores
and fleas markets and you are bound to fin treasures for next to nothing!

This is too cute!  What and easy way to create dramatic art and useful storage
all at the same time!
pbteen

Large posters, cork boards and frames are a great way to dress any drab space
and add some of your personality!
cool-kids-rooms

Monday, April 2, 2012

Chalkboard Vinyl Labels!

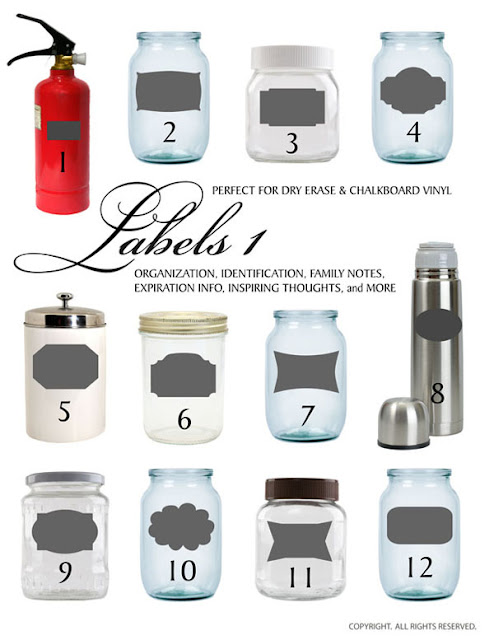
How fun are these?!  Introducing the newest design!  These labels can be used just about anywhere and are so versatile.  Pick your favorite chalk color and go to town labeling!  Of course, you can get them in any color vinyl but don't you just love the chalk board vinyl?

Item can be found under Borders, Labels and Embellishments.

Image Chalkboard label vinyl decal

Sunday, January 8, 2012

Valentine's Day Decor!


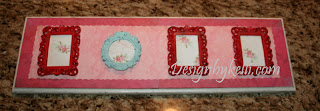
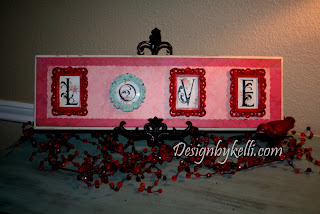
This one was so fun and super easy!  As I often do, I was on the hunt for another holiday project.  While in Michael's I found these adorable little baroque frames.  I immediately thought that it would be cute to add them to a wood board and make a cute Valentine's plaque.  The cost of this plaque is under $15 and is a great project to do with the kids!

Here is the tutorial~
Materials-
Wood plaque or board
Off white acrylic paint
Sand Paper
4 small decorative mirrors- ($1.50 @ Michael's)
Scrapbook paper- 3 different designs
Decorative scissors
Hot glue
Medium tack spray adhesive
"LOVE" Vinyl lettering.  Only $3.75!

First you need to get yourself a wood plaque.  I cut and prep these myself.  It is not as hard as you think.  Go down to your local hardware store and purchase a pine board that is about 8" wide.  They usually come in lengths of 6', 8', 10', and such.  If you go to Home Depot they will cut it for you!  Just tell them the length you want and they will cut the board down to create several boards for all of your craft projects!  For this project I used a board that was cut down to 24" long by about 8" Wide.
Be sure to sand the edges and surface of your wood to ensure a smooth finish.  If you have the skills and the tools you can even use a router to give your plaque and decorative edge.

Next, paint the outer edges and a border around the surface of your board.  No need to paint the entire surface because your paper will cover most of it.  As you see below, only about 1/4" of the wood is exposed after the scrapbook paper is applied.


Next, cut your paper to fit your board.  Keep in mind that if you use a board that is longer than 12" you will need to use 2 pieces of paper to cover the length of your board.  My paper measures 6"x 10" each.  This leaves a 1" border around the surface paper.  If you choose a paper with a print, be sure to match up the design at the seam so that the seam is somewhat disguised.  When you apply the frames they will cover a lot of the board so no need to worry about the seems being very noticeable.

Continue to cut a 1" border for the outer edge of your board using scalloped craft scissors to create a cute scalloped border.  Leave one edge straight. It can be tricky to keep your cuts level when using scrapbook scissors.  It makes it much easier to match up your borders if you use your original cut as a template by lightly tracing your original strip onto your paper.  Your will end up with 6 strips- 2 for the side and 4 for the top and bottom.  (See photo below).

Image Valentine craft vinyl decal

Once you have cut all of your paper, do a test run to make sure all of your paper fits the surface the way you want it to.  You will overlap your trim pieces (red) onto your surface paper (pink) so that you cannot see the edge of the pink paper.  Once you are satisfied with the look, use your spray adhesive to adhere your paper to the board.  The adhesive is a great alternative to using Modge Podge and is MUCH less messy!  Just be sure to spray it outside or in a protected area because the over spray of the adhesive will stick to your surfaces and is VERY difficult to clean up.

This is what is should look like-

Image Valentine craft vinyl decal

Now it is time to prepare the frames.  I chose 3 rectangle and one round frame.  Michael's has red, black, blue and cream frames.  I chose red and blue but lightened the blue by painting it. 
Turn the frames over and remove the stand and backing clips. You do not want these on the frames because they are bulky and prevent the frames from lying flat on the board.  No worries about them staying closed because it will be glued shut when you glue it to the board.
Remove the paper inside the frame and replace it with coordinating scrapbook paper.  It makes it easier if you use the original template from the frame to trace your new paper.

Image Valentine craft vinyl decal

Next glue your frames on your board spacing them evenly.  I find it easier to place the first frame and then the last before placing the 2 in the center.  This will ensure better spacing.

Last, place your vinyl letters on the front of the frames and you are done!  (You can order the lettering from me for only $3.75.  Just shoot me an email! designbykelli@gmail.com)

HOW CUTE IS THIS?!

Image Valentine craft vinyl decal

Thursday, December 1, 2011

Beautiful vinyl snowflake decals!
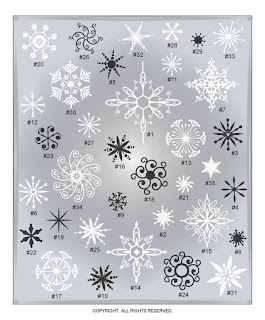
I just have to share these GORGEOUS vinyl snowflakes with you!  They look great on windows, mirrors and doors as well as all of your crafting projects.  I am going to place them in my windows in a random pattern to make it feel like snow is falling.  :)

Choose up to 6 snowflakes that fit in a 15" sq area for only $10.00!!!  Just shoot me an email and let me know which ones you would like. 

HAPPY HOLIDAYS!
Christmas winter vinyl decal snowflakes

Sunday, November 13, 2011

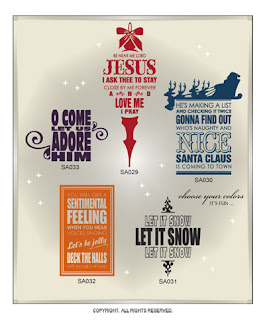
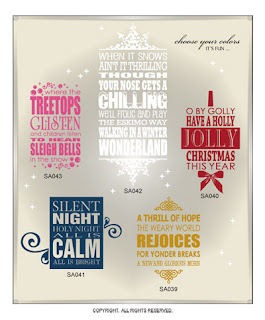
Christmas Vinyl Decals

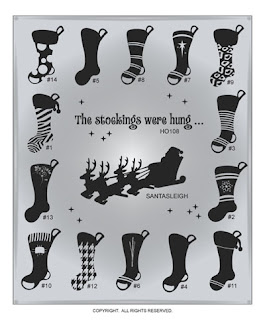
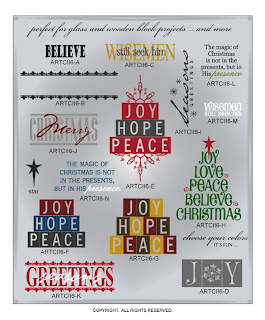
Today I thought I would highlight just a few of the many Christmas vinyl designs that I offer! The uses are endless! The designs are sticky decals that stick to any flat surface without leaving behind any damage! 
Use them on:
*Chargers           *Vases
*Glass frames     *Mirrors
*Wood plaques   *Walls
*Craft projects   *Doors and windows
*Glass Blocks and so much more!

Use a pre-designed quote, or create your own to go along with the fun designs. Most designs are under $12 and ship in 24 hours! You can pick your own colors too! Just shoot me an email if you are interested. Include the size of the surface you want to put it on and I will customize the size and send you a price. :)

Just imagine the beautiful snowflakes on your windows or place them on ornaments! 
To see all of my Christmas designs see the "Holiday, Christmas, Winter" tab in the right column!
Image Christmas vinyl decal
Image Christmas winter vinyl decal snowflakes
Image Christmas vinyl decal
Image Christmas vinyl nativity decal

Here are some finished designs~


Thursday, November 10, 2011

Thanksgiving Decor Ideas

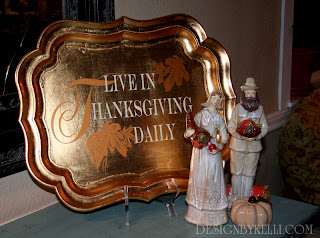
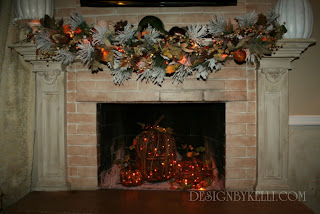
I have been working on my fall decor for Thanksgiving.  Here is my Thanksgiving Mantle and a beautiful gold platter that I found at Hobby Lobby and added one of my vinyl designs to it. 
The base of my swag on the mantle is a beautiful winter garland with snow dipped tips.  I love to add a little bit of winter to my Thanksgiving decor.  When Thanksgiving is over I just have to remove the Fall garlands and add Christmas items to it! 
Image Thankgsgiving vinyl decal decor

Image Thankgiving Mantle

Image Thankgiving Mantle

Sunday, August 2, 2009

Great way to give your windows a semi-private feeling!


How many of you have a window where you just "know" people are watching you? HAHA! I know I do! I have 2 small windows in my bathroom and I am constantly concerned that someone can see in. I didn't want to cover them with a window treatment and I didn't want to frost them completely because I love the view of my garden from my windows. I came up with a way to give the windows a semi-private treatment and give it some distinct style at the same time! I measured my windows and them cut a beautiful pattern to adhere to the window. It is just like the grids you see in window but the design is much prettier and creates more privacy. I love the way it turned out! You can also use an etched glass vinyl to get the etched glass effect.

The pattern for the window is not listed on my website but any pattern can be cut to create this effect. If you are interested shoot me a mail and I can easily come up with something for you!

Have a great Sunday and remember, comments are always welcome! :)

Wednesday, June 24, 2009

Vinyl Designs and Decal Ideas

Today I finished setting up the blog. I will be posting some fun things this week including ideas for family monograms! For now here are some fun ways to use my vinyl designs and decals!